HOW TO CONVERT TACTILE SWITCHES LINEAR? -TIPS & TRICKS
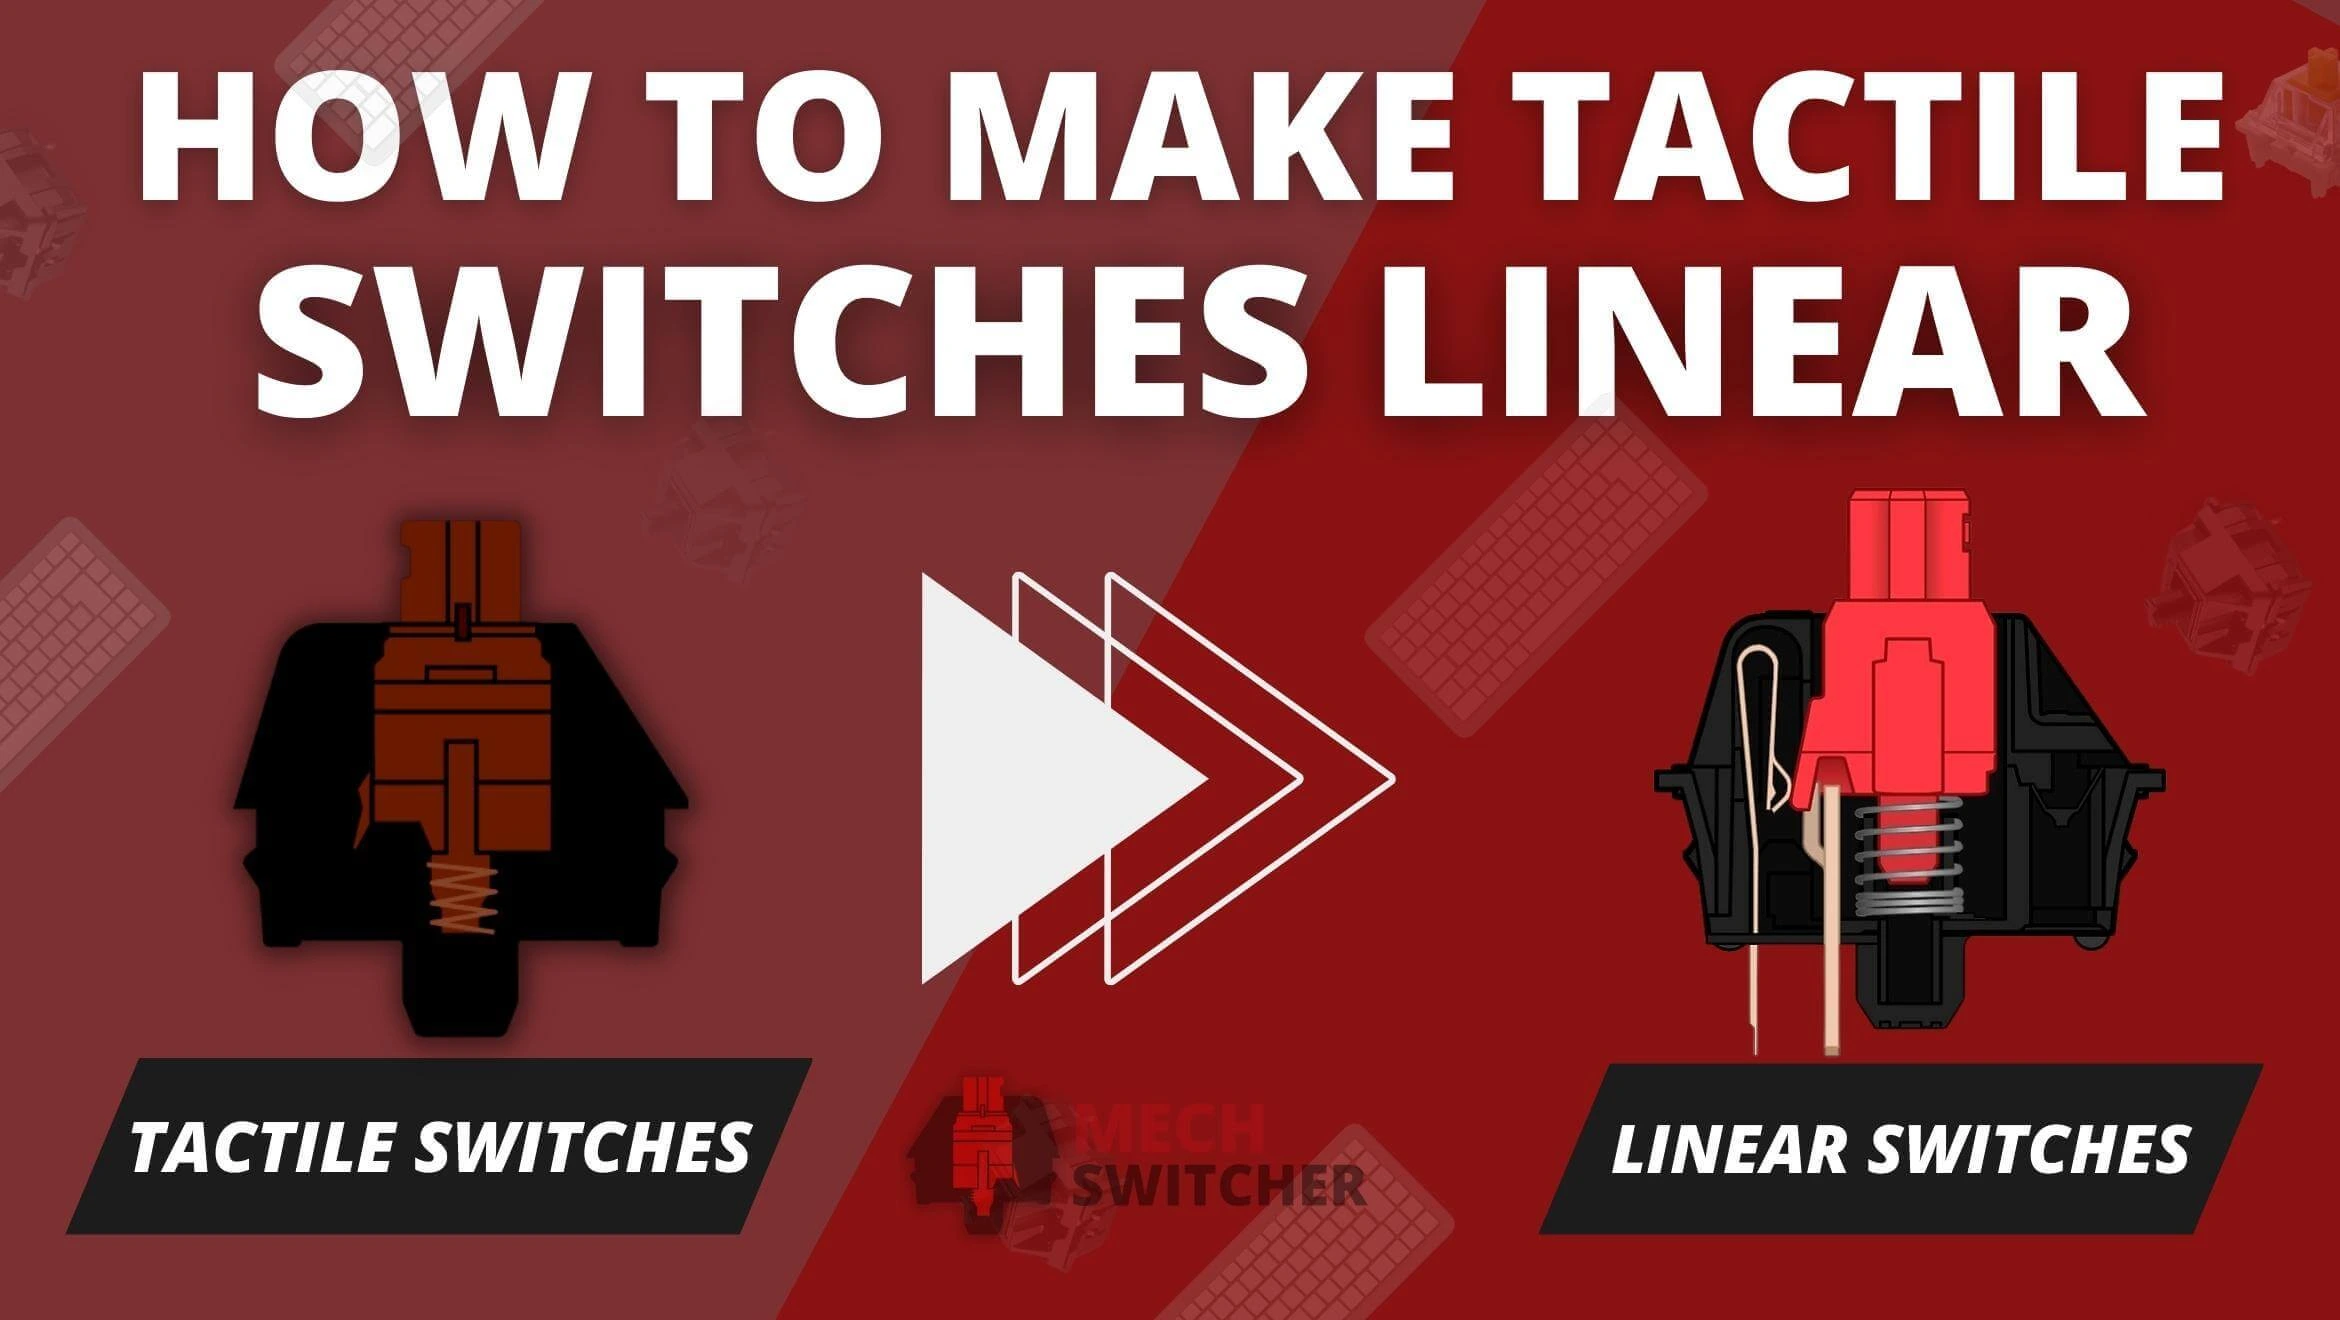
Tactile switches are trendy for typing due to their tactile bump and moderate noise. The noise closely related to linear switches which cause a tactile switch linear that is a rare process. I’ve prepared an easy guide, how to make tactile switches linear by reducing tactile bump and increasing smoothness and response time or get rid of moderate sound.
How to Make Tactile Switches Linear Step-by-Step?
So, I’ve Cherry MX brown tactile switches and i wanted to make them linear. Furthermore, you need to understand all components of tactile switches and get them as right as equipment to make tactile switches linear. Although don’t worry. Please follow the instruction below;
Step 1 – Getter Equipment:
Here is the equipment and tools you need for linear lube switches, including;
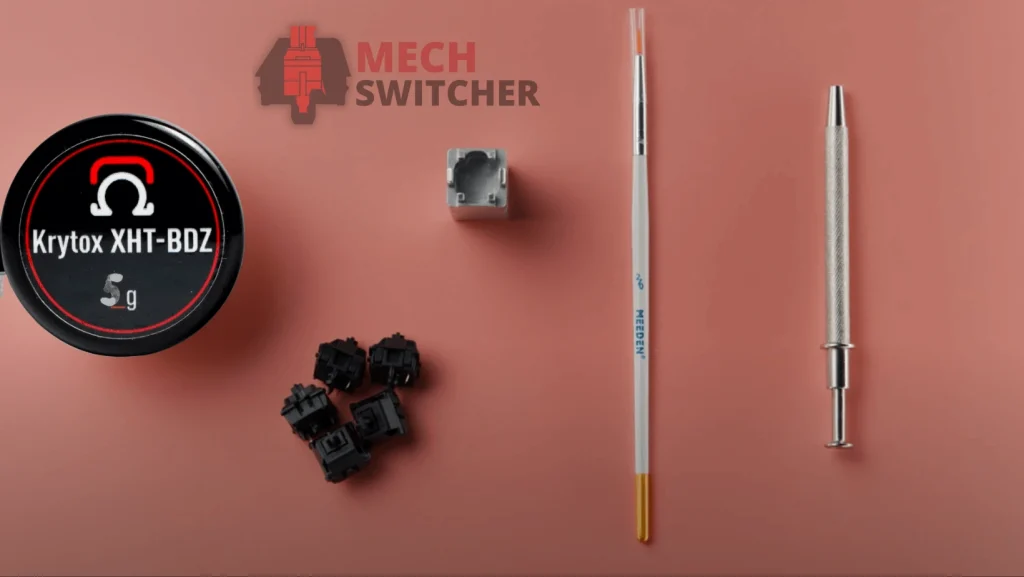
- Keycap Puller
- Switch Puller
- GPL 205 Lube by Krytox / TriboSyS 3204 Lube by TriboSyS
- Brush (0 or 00 )
- Tweezers
- Tool with four prongs
- Switches Opener
Step 2 – Removing Keycap and Switch:
You need to grab a keycap puller and switch the puller to remove the keycap from the hot swapper mechanical keyboard.
1: Take the keycap puller, put it over the keycap, gently wiggle and pull them straight upward.
2: In order to assemble them back up, try removing keycaps in the same order you removed them. Also, the tactile switch will pull out while pulling the keycap, removing it with the other hand.
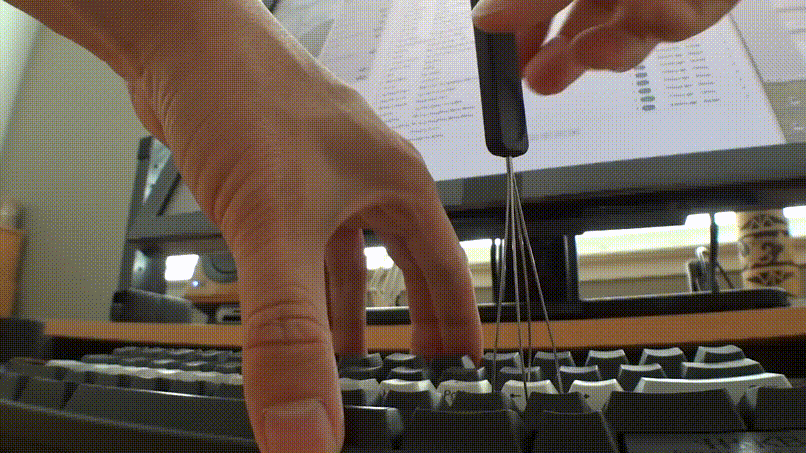
3: In a hot swapper keyboard, you should remove the keycap by hand, hold the keycap and pull upward with hard pressure. Suppose you need a keycap puller.
4: After that, take the switch puller, place the south side of the tactile switch, press down or gently wiggle and pull them straight.
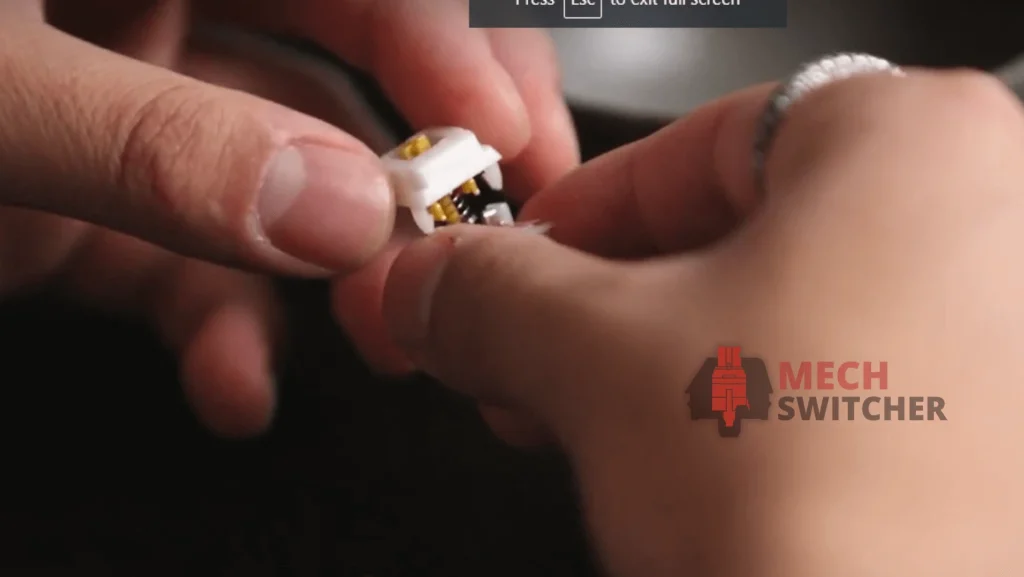
Step 3 – Open the Switch:
Grab a reliable switch opener if you have uncountable open switches. My switch opener is an aluminum version. I like it best.
1: Nevertheless, you should check the clip lock and examine the tactile switch legs if your linear switches have legs. Using the index finger and thumb of both hands, press down the handle. The stem, spring coil, and bottom housing will need to be separated once the top housing has been taken off. Moreover, a stem, spring coil, and bottom housing will need to be separated once the top housing has been taken off.
2: You can also use a 2.5mm flathead screwdriver except the switch opener. By inserting the screwdriver under the upper housing and rotating the screwdriver upward, four side clips were screwed in place.
Components of Tactile Mechanical Switches
To make tactile switches linear, you should understand every component. Such as;
Stem: Stem is available in several colors and represents switch types like Cherry MX brown, clear, etc. They’re varying travel distances and actuation. Furthermore, the tactile bump is produced through the stem legs, and the stem is responsible for producing moderate noise. The keycap is attached to the head of the stem.

Top Housing: It has a stem that protects the inside of the upper housing of the tactile switch. Additionally, when the stem drops, keycaps hit the upper housings.
Coil Spring: The coil spring is a crucial part of every mechanical switch because stem pushed up and reset the key back. Although, the spring measures the resistance and actuation of your tactile switches.
Metal Leaves: Tactile switches are attached with two tiny gold leaves. These leaves also come in contact with slender pins, When they come into contact with the switch, they attach to its bottom or protrude from its surface. These metal leaves are also physically soldered to the keyboard’s PCB.
Lower Housing: The final component is the lower housing because the stem slider freely moves up and down in tactile switches using the rails of the lower housing. Although, the center pole is responsible for a stable spring and stem or upper housing attached with a lock of bottom housing.
Start Changing In Tactile Switch
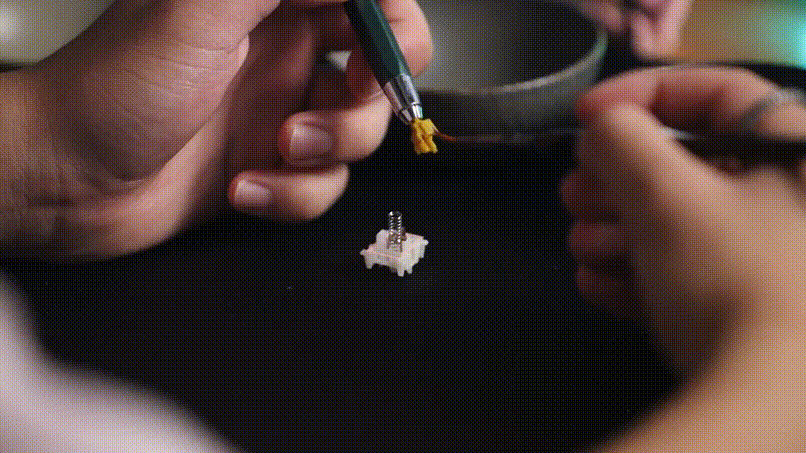
After opening the tactile switch, you should start changing by lubing them to make tactile into fastest linear switches with noisless lin. It’s time to reduce the tactile bump and moderate the sound of the tactile switch. This is a brown tactile switch from Cherry MX. However, open the Krytox GPL 105 lube and paintbrush (0 or 00 sizes). Hold your horses, and follow these instructions, and be cautious during the first turn.
Step 1 – Load Brush with lube:
By using the top lid of the lube jar, spread the loop evenly on the paintbrush. Open the lube and spread a tiny amount onto the paintbrush after opening it. This prevents lube lumps from forming on the brush. Just a small amount of lubricant is needed, It has a shiny appearance without being white.

Step 2 – Start With Lower Housing:
Hold the lower housing in hand, take the Lube loaded bush and start swiping across the slider once. Then the other side and opposite side of the brush swipe across. So, ensure that the loop is distributed evenly. The process should be repeated three times for each slider, followed by another slider to ensure the loops are applied evenly.
Last but not least, lubricate the bottom housing center pole on the other side. And repeat three times to lube the brush around the center pole. To keep tactile switches from becoming squishy, don’t lubricate them inside the bottom housing hole.

After that, don’t Lubricate the leaf’s legs because they can massively mess up the tactile switch. So, try to avoid lubing the metal leaves of tactile mechanical switches.
Step 3 – Stem:
Using a stem holder or prong holder, hold the stem and backbone of the tactile switch. Grab the prong holder open, then 4 pins, (here I’ve cherry MX brown tactile switch)
Re-opening the lube, take a paintbrush, and do a little bit of lubrication on the top lid. Swab the stem slider on the opposite side of the stem to make sure it is evenly distributed. Don’t forget to lube the legs of the tactile brown stem because lubing will reduce the tactile bump and make it linear. Swipe the stem forwards and backwards.
Simply put, lubing the stem leg and rails all over means not lubing the spring contact area (do not lube the stem pole).
Step 4 – Coil Spring:
Hold the coil spring correctly after lubing it with the tweezer tip on the spring and the outer edge of the coil spring with the other tweezer tip.

After holding the coil spring, apply some lube the entire length. You should also use less lube here and more over the spring, since coil springs often ping. Also, using the same method, hold the spring on the other side after completing the process on one side. Swipe the spring from one end to the other using the lube. Lubrication takes time.
Step 5 – Pull out Leaf:
This step is optional to reduce sound completely. The ball is in your court. Take the bottom housing and pull out leaf A ( hold the leaf head by index finger and thumb, pull up straight. Place the thumb in the actuation point, pull it up slightly and assemble them back. This technique makes the tactile switch much noiseless.

Assemble the Tactile Switch Back
Congratulations! It would be best if you made tactile switches linear, and Now it’s time to assemble them back to test working.
You can place the lube lower housing on the table or the floor if it is on a flat surface. Assembling tactile switch components using tools is better than reassembling mechanical switches by hand.
Hold the coil spring by using a tweezer and put it over the centre pole of the bottom housing
Using an angled tweezer, place the film gently on the bottom housing when you plan to film the tactile switches. The pole should be inserted inside the coil spring while the stem head is held by the prong holder.
Once the hole has been drilled, a upper housing is inserted, extended, and snapped. After lubricating the tactile switches, repeat the process with the other linear switches.
Install Tactile Switch
After assembling the tactile switch, it’s time to put it back into the PCB of the mechanical keyboard.
Step 1: Take the switch puller and hold the tactile switches by the south side. Make sure the metal leaf, on the PCB of keyboard, correctly placed inside. Linear switches should be reinstalled manually.
Step 2: To install tactile switches, you need to use your index finger and thumb to push them inside the PCB or apply some hard pressure once a loud click is heard.
Step 3: Use (https://keyboard-test.space) to test the linear switch before placing the keycap. The keycap should be placed over the stem after you have confirmed that your tactile switch works. The switch must be disassembled if it doesn’t respond, and reassembled if it doesn’t.
FAQ – FREQUENTLY ASKED QUESTIONS
Final Thought
To make the tactile switches linear, you need to pay attention to all components of tactile switches and understand them. After that, avoid too much lubing because they’ll destroy the switch. They are also lubing stem legs because they’ll reduce the tactile bump. It looks like a headache for the first time, but that’s a whale of a time process.