HOW TO LUBE LINEAR MECHANICAL SWITCHES? – A COMPLETE BEGINNER FRIENDLY GUIDE

Lubing is crucial to enhance the ability of mechanical switches. And they bite at the cherry to increase your linear switch’s smoothness and keystroke feeling. But, the headache is how to lube linear switches. So, here’s a whale of a time because I’ve arranged an easy pie guide on how to lube linear switches swiftly.
Why Lube Your Linear Switches and their Essentials?
Lubing can upgrade and improve linear switches in several ways. The acoustics are better, the actuation is smoother, the rattles and scratches are reduced, and the tactile bump is reduced, making it an enjoyable or therapeutic experience. Additionally, they’ll provide a smooth feeling and lifting sound and make your linear switches keyboard high quality.
A beginner doesn’t need to lubricate the switches because they can’t feel or see any difference between lubricated switches and unloaded switches, and they go pear-shaped for the first time. Which type of linear switch lube will work fine? After testing, there are three standard linear switches the Lube will work better on cherry MX linear switches and gateron;
- Cherry MX red Linear Switches
- Gateron Yellow Linear Switches
- Gateron Ink Black Linear Switches
Although you should do standard tactile switch lubing, avoid too much because they will benefit from it when lubricating. Still, excessive lubrication can remove the tactility of these switches. Such as
- Cherry MX Brown Tactile Switches
- Cherry MX Clear Tactile Switches
Also, don’t even try to lube all the switches because they’ll take away the tactile feel and sound of switches. Kailh Box mechanical switches don’t need to be lubricated either.
How Lube Linear Switches Efficiently?
Over 500 linear switches are lubed in less than 48 hours by me. That’s why lubing mechanical switches is my favorite hobby. Before starting, you need to prepare yourself by gathering tools and not being sick as a parrot, and you can easily do it. Lubing lots of switches will be time-consuming. For the first time, you need to be attentive.
Step – 1 Getting Tools:
So, here I’m suggesting the right tools and equipment for linear lube switches, such as;
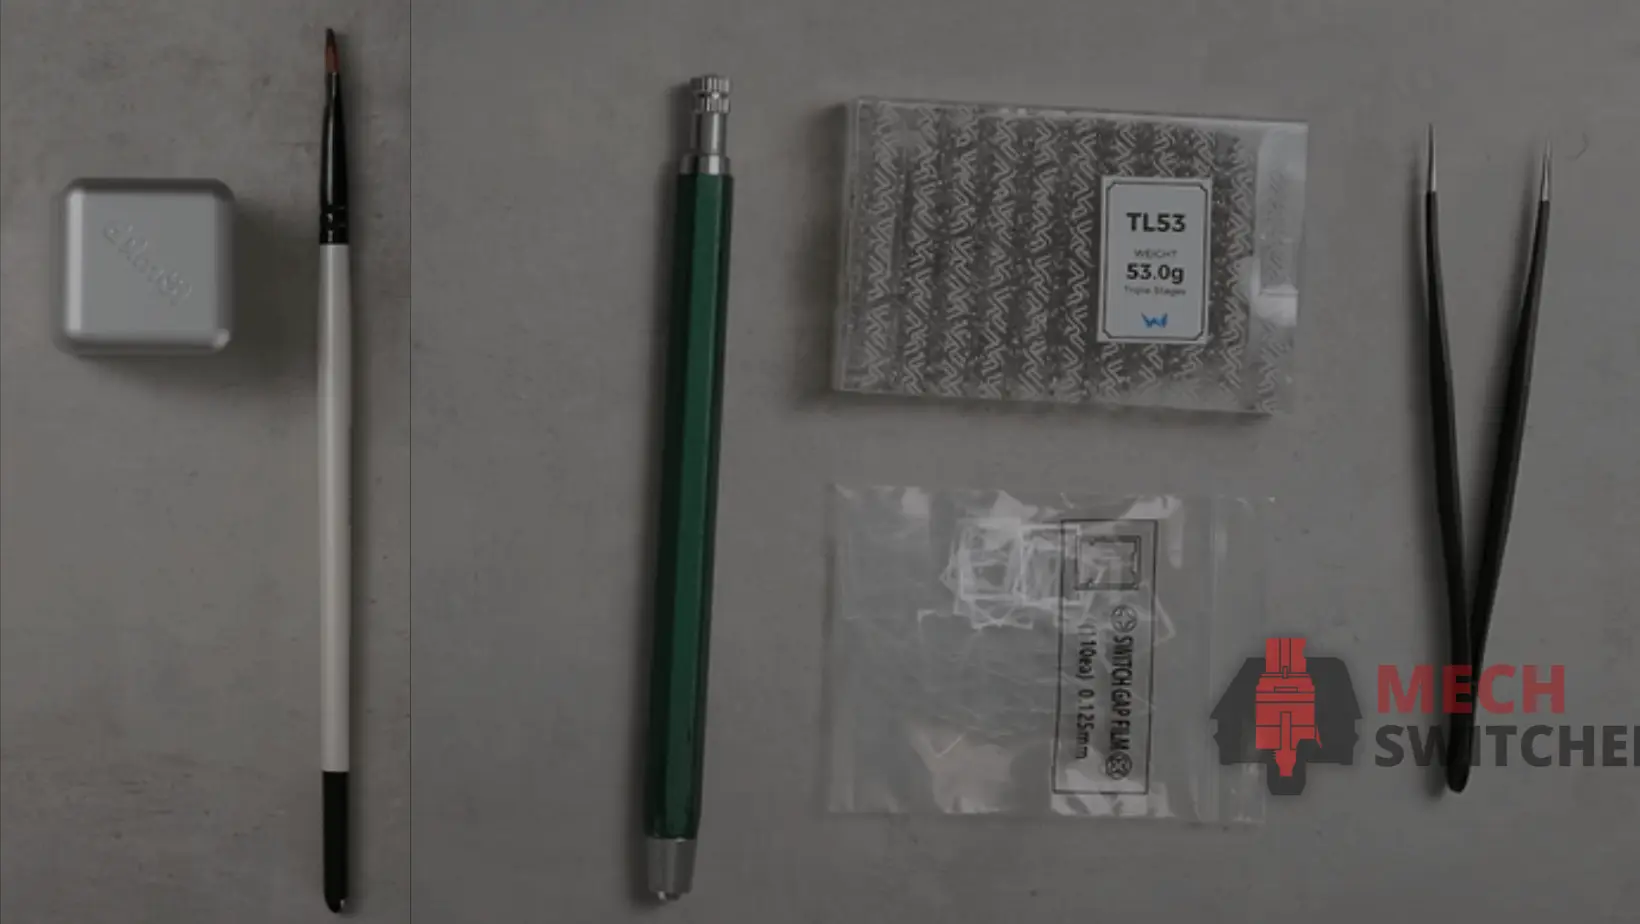
- Krytox GPL 205 Lube / TriboSyS 3204
- Small Brush (Size 3 or 4 )
- Tweezers
- 4-prong tool
- Switch Opener
- Keycap Puller
- Switch Puller
Why is Krytox GPL 205 Lube good for Linear Switches?
Different types of lubes are available for different types of mechanical switches. One of my neighbors was using the wrong Lube for his linear switches, resulting in a considerable mess, getting stuck, and drying out over time.
Although, after lubing over 500 linear switches with Krytox GPL 205 lube, the keystroke result was fantastic, and I feel smooth actuation, better sound, and tactile bump had reduced much more, etc.
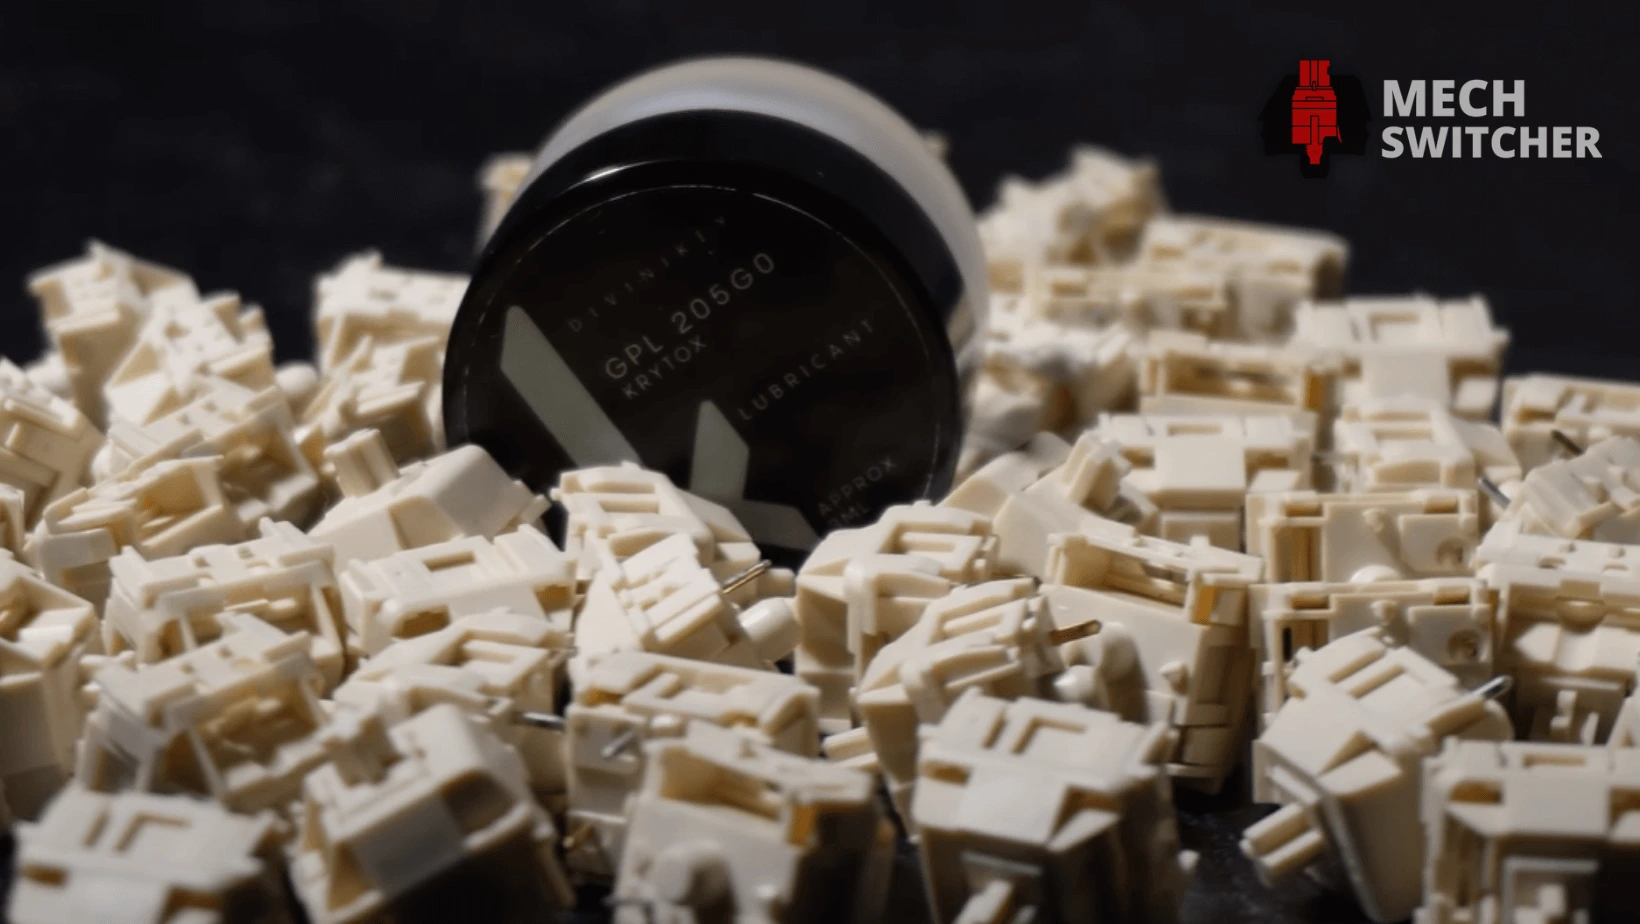
On the other hand, TriboSyS 3204 lube is also trendy for linear switches. Everyman and his dog like it, but as compared to both lubing, the Krytox GPL 205 lube provides better results because they’re thinner than TriboSYS 3204 and as right as rain for linear or tactile switches.
Step 2 – Removing Keycap:
Linear switches installed in your hot swapper mechanical keyboard, then you need to remove it after removing the keycap.
Over the key, place the keycap puller. Pull the keycap straight up with hard pressure after gently wriggling the keycap puller back and forth. Although the keycap will be removed efficiently, the process is a whale of a time because this keycap pulling method is safe and acceptable to avoid any risk.

In contrast, the hot-swapper keyboard allows you to remove the keycap by hand, holding it and pulling it up straight. As a result, the keycap puller bites at the cherry to remove the keycap. Occasionally, removing the hand damages the keycap or switch stem after testing. Otherwise, depending on you.
Tip 1: For beginner tips, try to pull out all the keycaps in the same order because they’ll help reassemble them quickly.
Tip 2: You don’t need to worry after the switch comes out while pulling the key. In this case, remove the switch under the keycap by hand.
In the Non-hot Swap keyboard, But if you have non hot-swap keyboard, let your hair down the same, using a keycap puller to pull out keycaps by gently wiggling them.
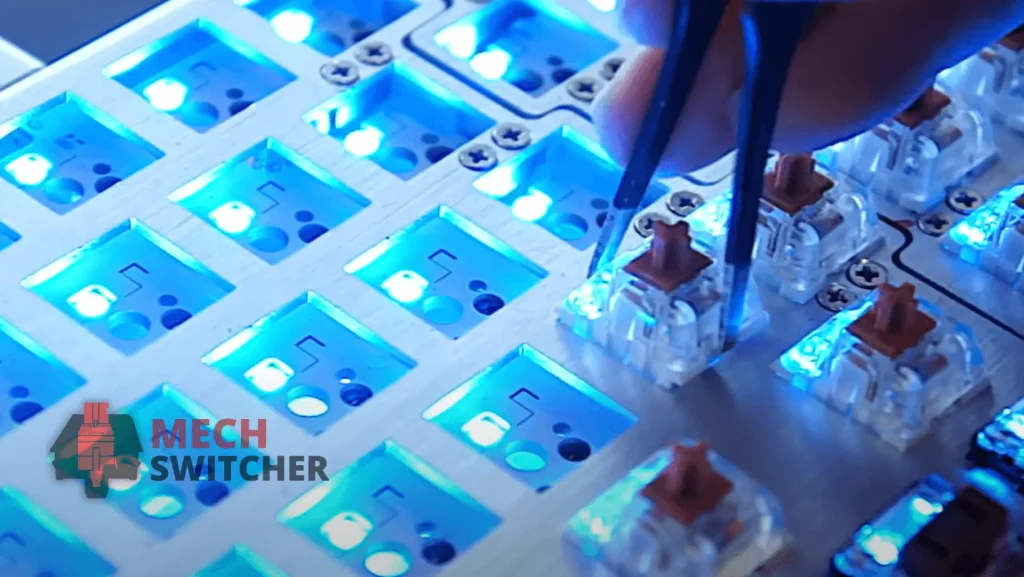
Step 3 – Pull Out Linear Switches:
After removing the keycaps over the switches, you need to pull out linear switches to start lubing. Grab the switch puller to disconnect the linear switch from the mechanical keyboard PCB.
Place the switch puller under the tabs before squeezing them because switches have tiny tabs at the top and bottom. After that, the switch puller pressing tabs gently wiggle and pluck it upward efficiently.
Furthermore, the first time I pulled out switches, it was a bad experience. Several plastic tabs have broken, and plates have been scratched up, which is quite challenging for me. It is only through practice that we can become perfect. Here are some tips to make this practice easier for the first time.
Tip: Avoid using metal switch pullers. They’ll scratch the PCB plates and try to find a stainless steel switch puller because that’s too sensitive for the first time.
Step 4 – Take apart the linear Switches:
Grab a reliable switch opener for uncountable open switches. But I’m using the aluminum version switch opener. That’s my favorite. Although, place the linear switch over the switch opener by checking the clip lock, and keep analyzing linear switch legs (my black linear switches come with legs).
Also, put both hands, index finger, and thumb, and press down the handle. After that, remove the top housing, and separate the stem, spring coil, and bottom housing.

You can also use a 2.5mm flathead screwdriver if you don’t have a switch opener. By slightly rotating the screwdriver and pushing it upward, the screws were installed with four side clips.
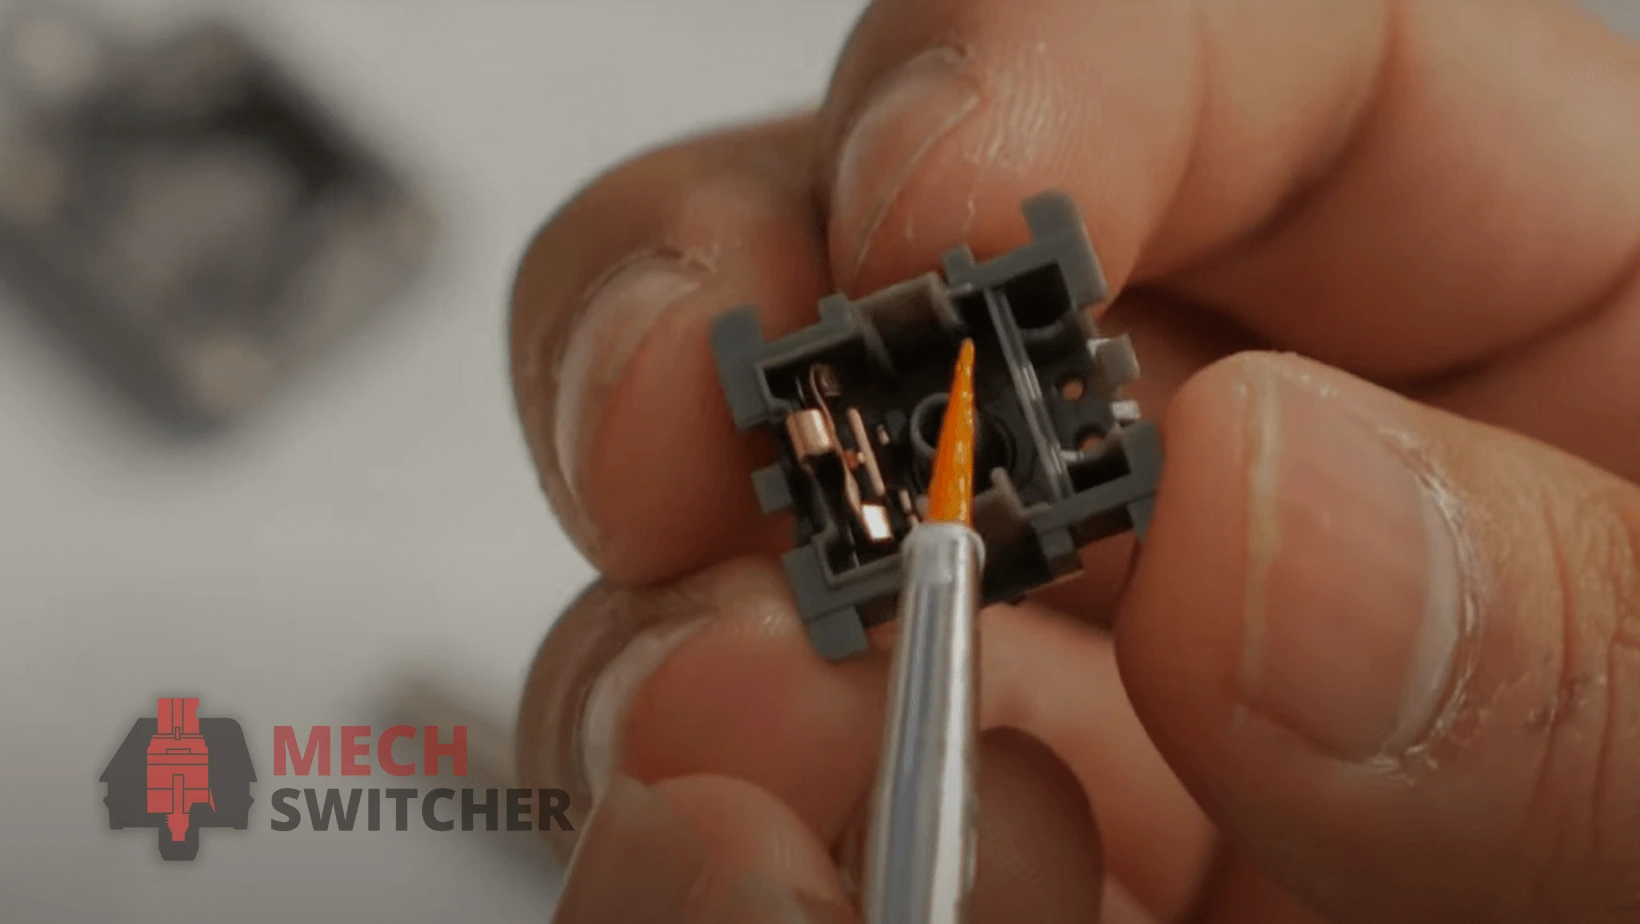
Components of Linear Switches
After opening the linear switches, you need to understand each component because they’ll help to start lubing.
Stem: Stem is available in various colors representing the switch type and stem represent what color are linear switches, like red, black, yellow, etc. They’re responsible for varying travel distances and actuation. In simple words, the keycap is attached to this part.
Upper Housing: The upper housings of linear switches are transparent and attach the bottom housing to the stem, which protects the inside. Further, when you tap on them, keycaps hit the upper housings as the stem drops.
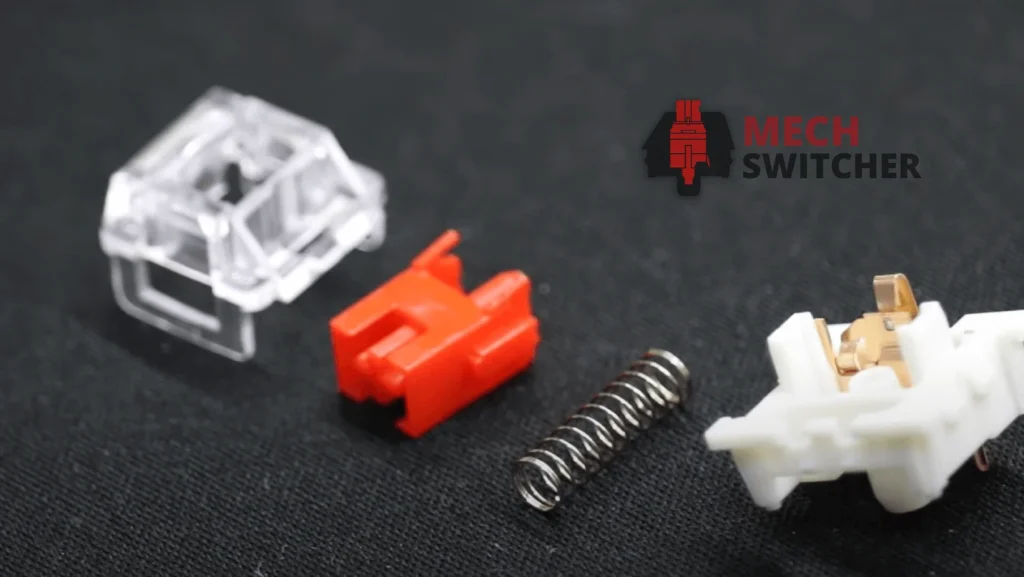
Coil Spring: An actuation time and resistance of linear switches are measured by inserting a coil spring into the pole (slider). You can feel bumps due to coil springs, although they push up the stem and help rest the key.
Metal Leaves: The two tiny metal leaves attached to linear switches are gold pieces. Also, when these leaves are in contact, slender pins attach to the bottom of the linear switch or protrude. The keyboard’s PCB is also physically soldered with these metal leaves.
Bottom Housing: Here are the bottom and upper housings required for the mechanical switches to work. The stem slides freely up and down in a linear switch using rails or LED slots in the bottom housing.
Start Lube Linear Switches
It’s time to enhance the sound and make fastest linear switches on each keystroke feeling by lubing the linear switch. However, take the small paintbrush, and open the Krytox GPL 205 Lube / TriboSyS 3204 lube. So, hold the horse, follow the instructions step-by-step, and be cautious for the first time.
Step 1 – Load brush with Lube:
Use the top lid of the lube jar to spread the loop evenly on the paintbrush. After opening up the Lube, you should take a tiny amount of it and spread it onto the paintbrush.
It helps to keep it manageable so that there’re no lube lumps on the brush. It’s enough to apply a small coat of lubricant, and the brush looks shiny without looking white.
Step 2 – Lube Bottom Housing:
Jump on the bandwagon to start lubing with the bottom housing and grab the bottom housing with tweezers or your hand. And start with both rails on either side, where the stem slide moves up and down.
1: Start with swiping across the stem rails (slider) once.
2: After that, move to the other slider with the opposite side of the brush and swipe up the paintbrush. This’s to distribute the loop evenly. Repeat the process three times with each slider and then another slider to coat it evenly with a loop.

3: Finally, apply the Lube to the other side of the bottom housing pole. Linear switches don’t lube inside the bottom housing hole because too much makes the linear switch squishy.
4: After that, you need to lube the legs of the leaf as well because this is for the maximum smoothness of the linear switch. Unlike, don’t try this process for tactile switches.
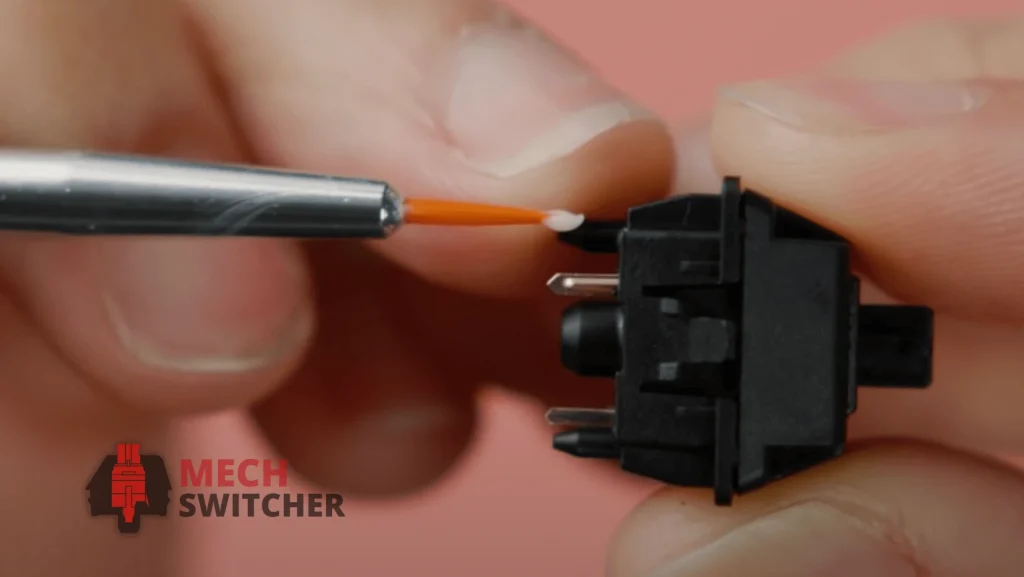
Step 3 – Lube the Stem:
Hold the prong holder or tweezer to grab the stem. After all, the prong holder is right as rain to lube the stem easily.
1: Firstly, hold the head of the stem with a prong holder. Also, re-open the Lube, take a little bit on your paintbrush, and use the top lid to easily distribute the Lube. You see a light sheen, not too much white Lube, onto the paintbrush.
2: Take the loader brush, swipe the stem rail (slider), and swipe the opposite side of the stem.

3: Moreover, one swipe across the front and one swipe across the stem back.
In simple words, distributing the Lube all over the linear stem means Lube the stem legs and stem rails except the spring contact area (don’t lube the pole of the stem). This’s a linear switch, and take it with a pinch of salt because this lubing method makes the switch smoother.
Step 4 – Lubing Coil Spring:
Put the tweezer tip into the spring, and the other tip is the outer side of the coil spring to hold it correctly after you have completed the lubing stem.
1: After holding, get some lube and apply the end of the spring and the entire length of the coil spring. In addition, you need an excellent coating lube over the spring and use less Lube here because you could eliminate the ping that typically gets from coil spring.
2: Hold the spring with the other side using the same method after completing one side process. Start the Lube at the subsequent end of spring and one swipe all over the spring.

Lubing is a time taking process. You need time to increase the lubing speed if it’s your first turn. But be cautious for the first time.
Assemble the Linear Switch Back
Congratulations! You should complete the lube linear switch by the skin of your teeth. Now it is time to assemble back to test the switch working. Place the Lube lower housing onto a flat surface like a table and floor. Using tools to assemble linear switch components because the Lube will miss out by using a hand to reassemble a mechanical switch.
Hold the lube coil spring with a tweezer and put it over the center pole of the bottom housing.
For planning to film the linear switches, take with an angled tweezer and gently place the film on the bottom housing

Hold the stem head by the prong holder and place the pole inside the coil spring.
After that, generally place the top housing, pass through the hole over, and snap the entire thing back into place. Repeat the same process with other linear switches after lubing.
Install Linear Switch
Installing linear switches back into the mechanical keyboard PCB, follow the steps below;
Step 1: Grab the switch puller and hold your linear switch from the south side. And check the PCB metal leaf and put it inside the PCB of the mechanical keyboard. As opposed to that, you should hand-replace the linear switch.
Step 2: After putting in a linear switch, you need to press them inside the PCB by using your index finger and thumb or applying some hard pressure after you hear a loud click sound.
Step 3: Before placing the keycap, you need to check the working of the linear switch by using (https://keyboard-test.space). After checking if your linear switch works fine, place the keycap over the stem. On the other hand, if the switch doesn’t respond, you need to disassemble it and check to assemble it back.
In Non-hot swap keyboard: Those unfamiliar with soldering should watch a YouTube video before inserting their linear switches into the PCB.
FAQ – FREQUENTLY ASKED QUESTIONS
Final Thought
Keep in mind using Krytox 205 GPL for lubing your linear switch, even though you need a bit of time. The way your mechanical keyboard looks and feels can also be greatly improved by lubricating linear switches. After lots of practice, that’s an easy pie, and I had a whale of a time for you. This lubing technique works for linear switches, don’t even try lubing on tactile switches because they can mess up the switch working.